Bring out the Bombe ..
A fool-proof recipe for Bombe Alaska with a low-sugar, no-churn ice-cream 🎂
Hello, it’s a quickie newsy this week, as I am in the thick of important party preparation. Honestly, is there anything more magical and exciting than a boy turning eight? My son feels like he has won the lottery this week.
And… I keep being reminded that Christmas is just around the corner … (don’t deny it, steam train approaching..) so I am knee-deep in menu planning for those first few weekends in December where we see friends and family, and catch up over picnics and kid-friendly long-lunches.
With this in mind, I am pulling together our bombe alaska celebration cake for our big bash on Sunday, and making an extra few for the month of December. I am sharing this with you today as it’s DEAD-EASY and a perfect match for any upcoming celebrations.
Of course -
Making ice-cream cake for a birthday party celebration is always a good idea. It can be made well in advance (no last-minute stress as you are doing 50-other-things) and you can make your own base (see my easy no-churn, low-sugar recipe below) or take a shortcut with some good-quality store-bought types and combine the two.
This recipe is gluten free, grain-free and low in sugar. I am one of ‘those parents’ that doesn’t serve a lot of sugar at birthday parties. My kids have never done well with white sugar and food preservatives, so I try to avoid it at all costs.
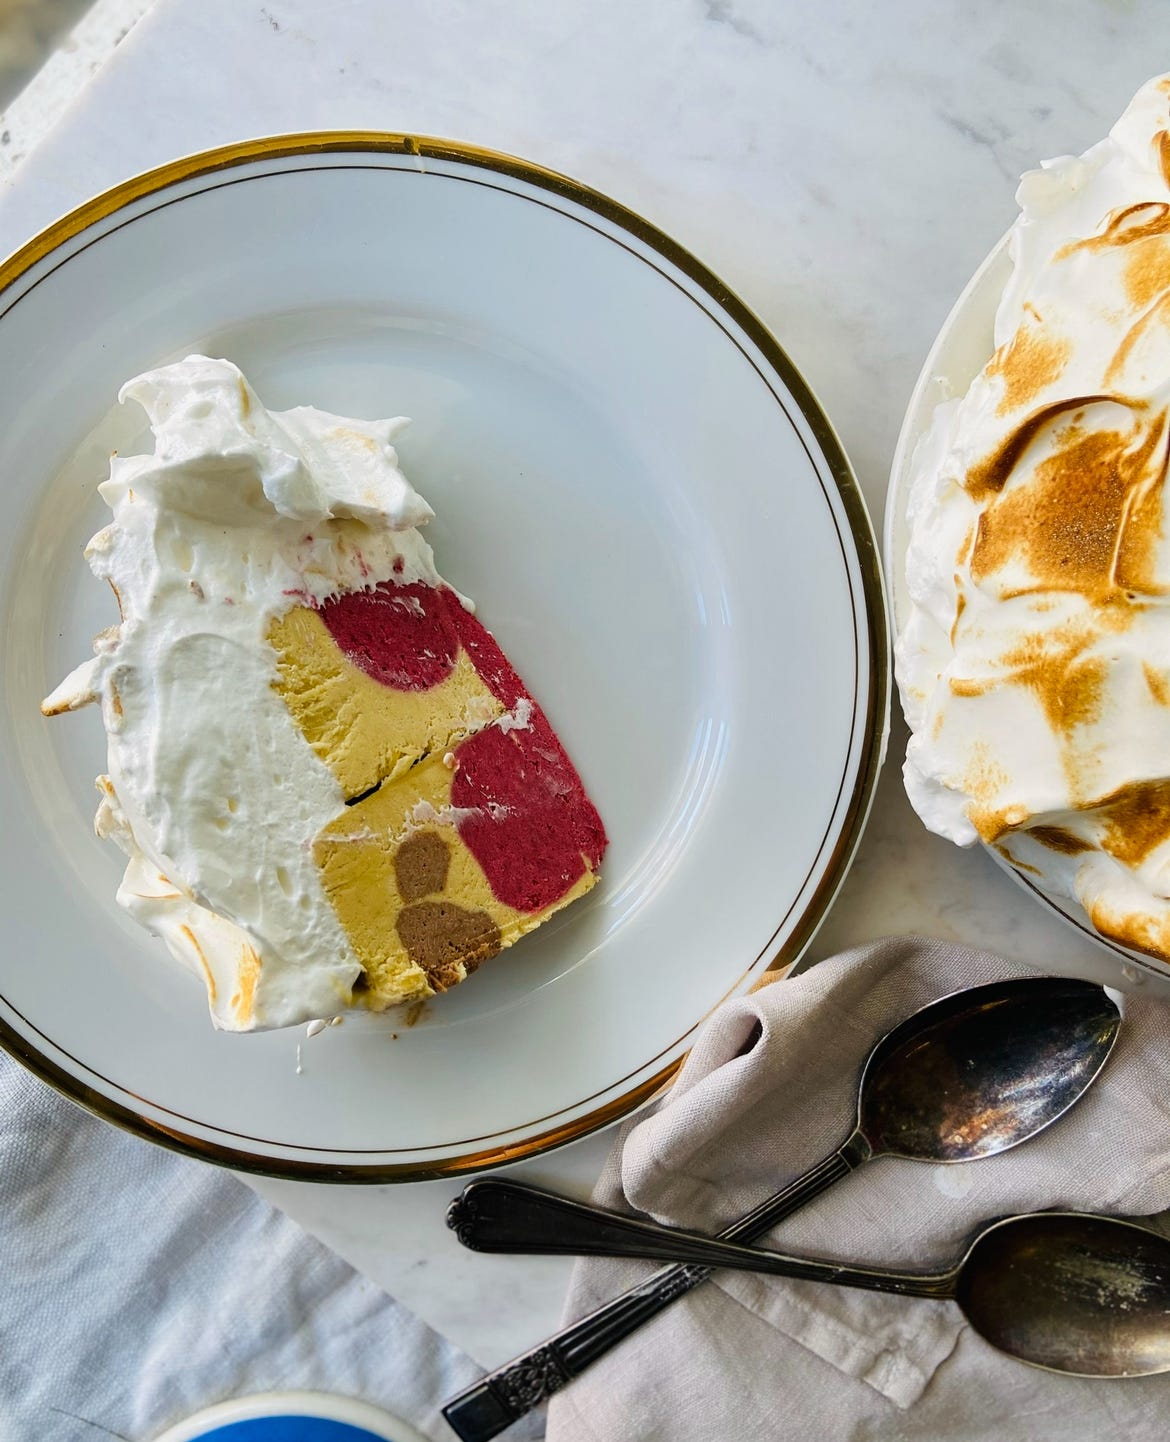
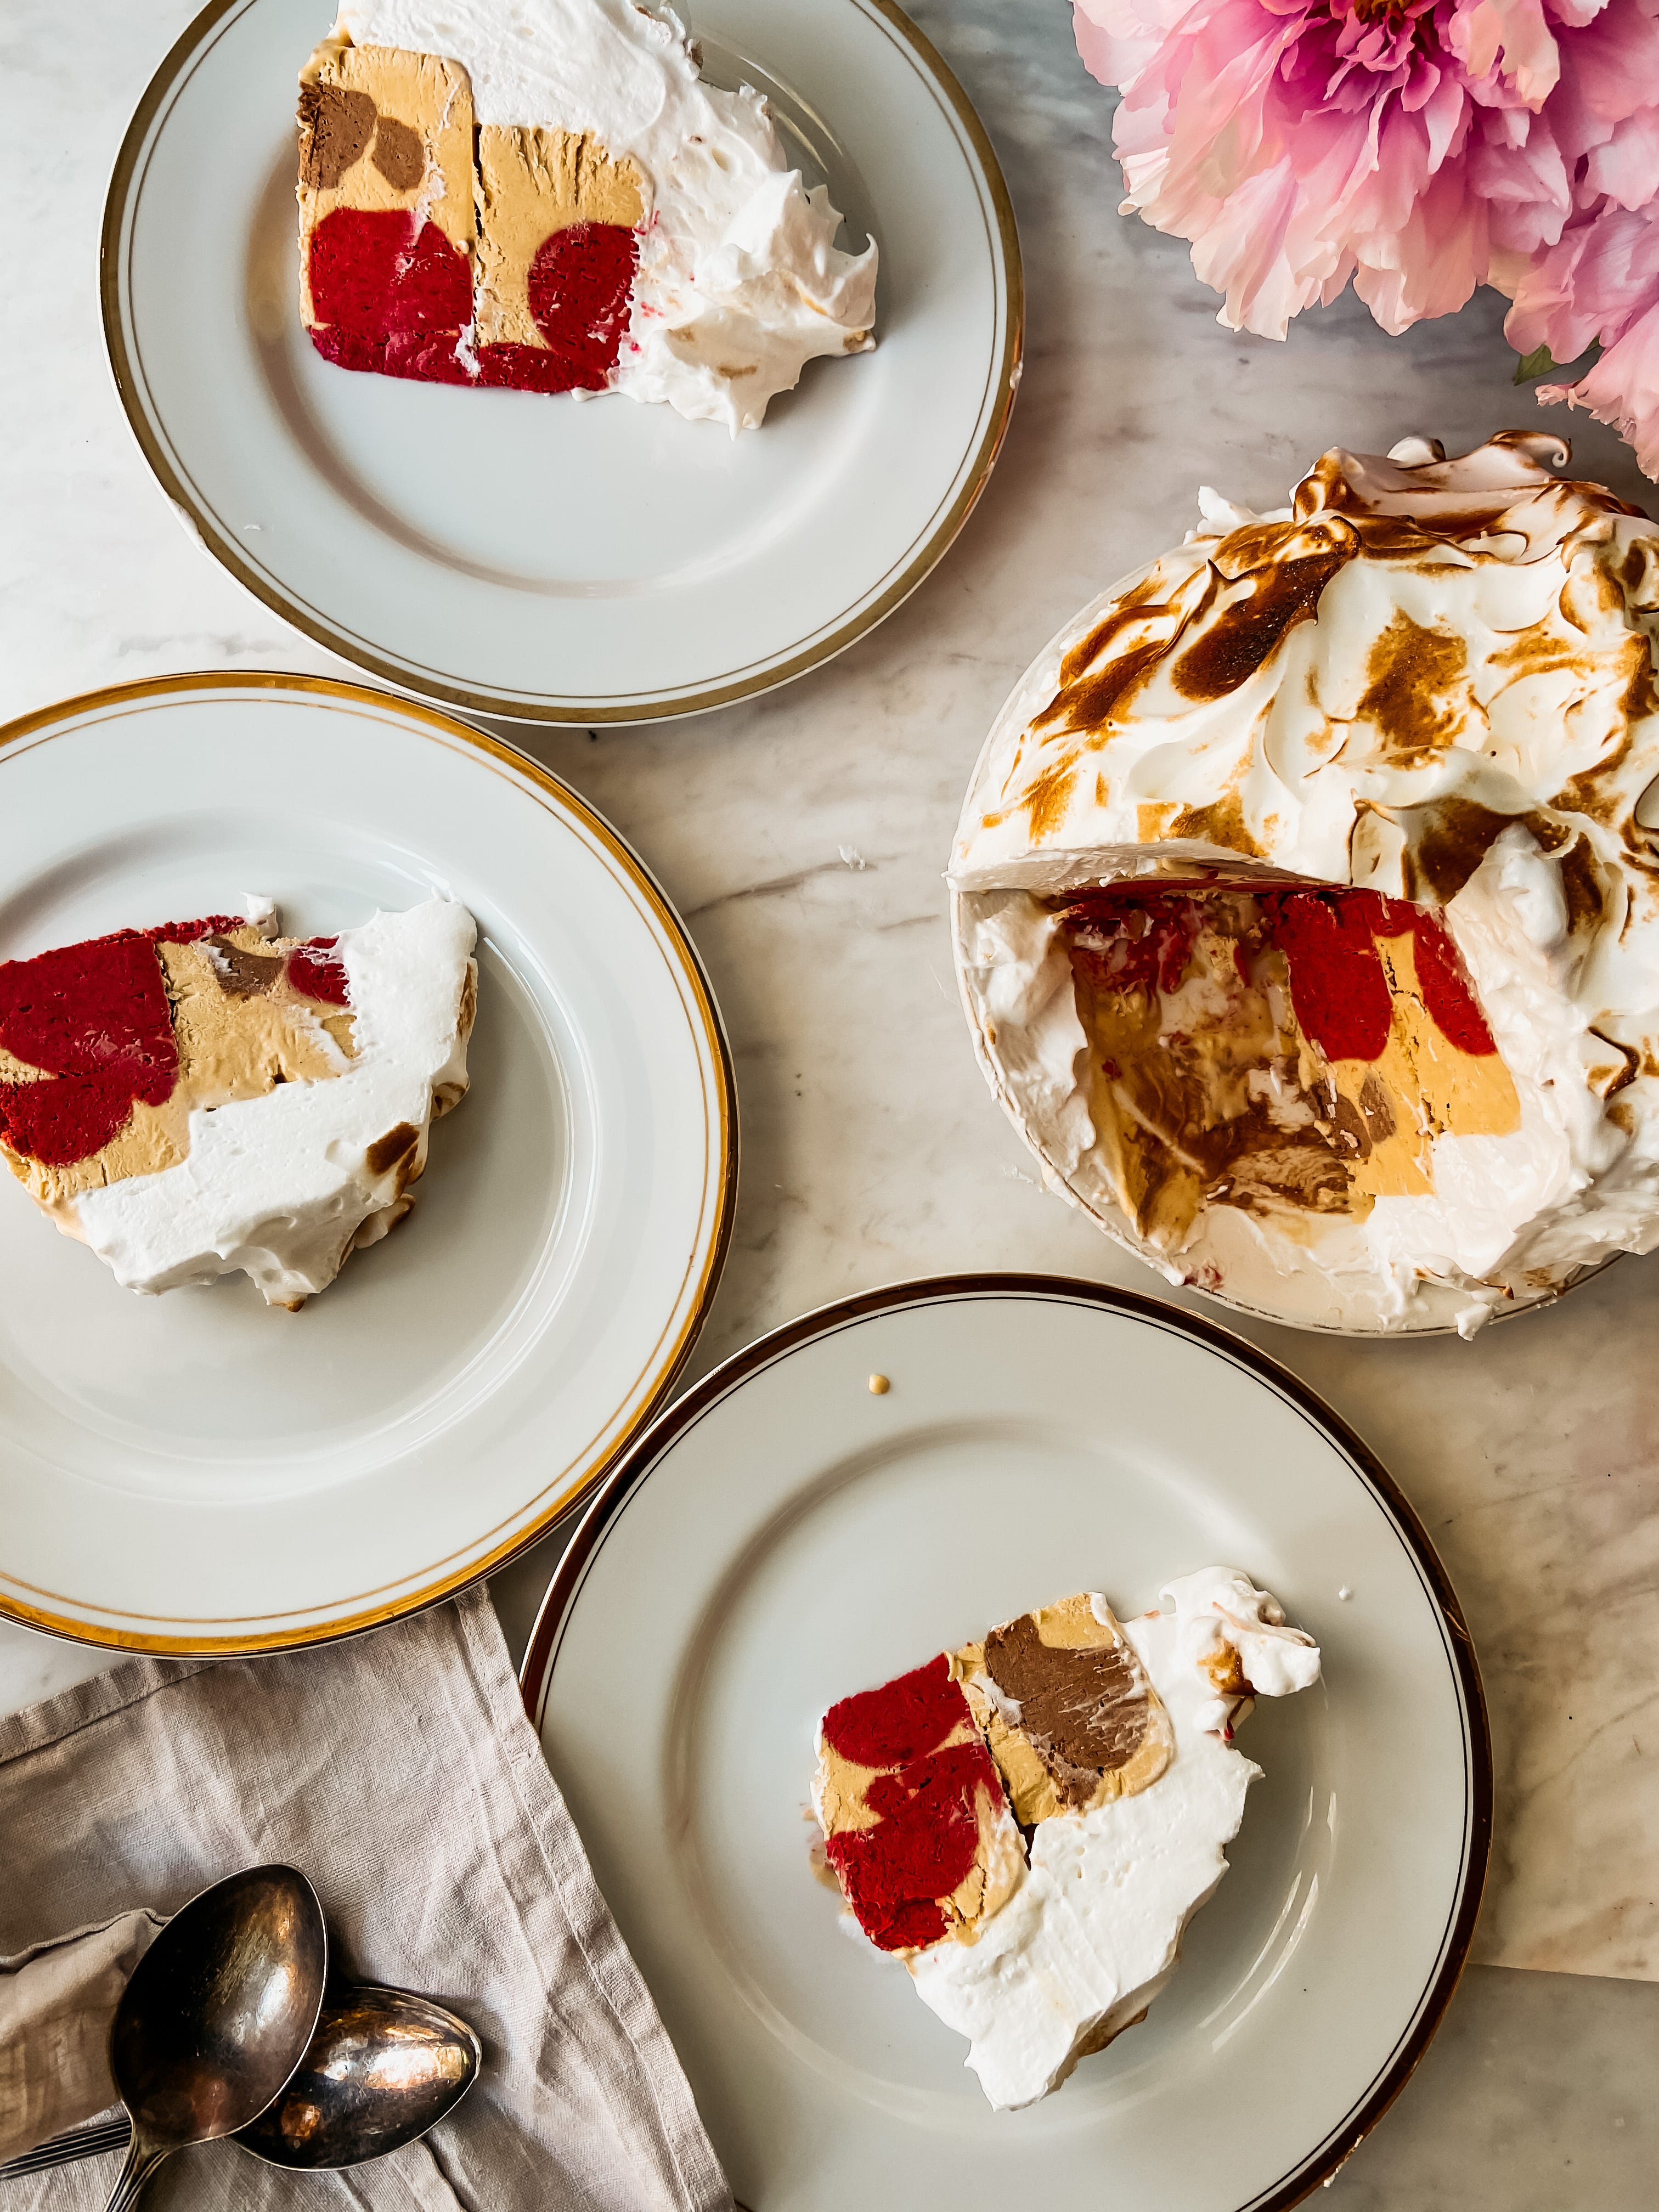
This cake travels well. Yes really, even a good ice-cream cake can travel. We had a laser-tag party out in the park a few weeks back and I placed this cake in a small cardboard box with a thin layer of ice packs on the bottom. It was unscathed and ready to go thirty minutes later. The meringue layer on the top helps insulate the ice-cream layer so that the edges don’t melt too quickly (genius!). My estimate is that you have a good 45 minutes before any edges even start to drip, and on a cooler day, you can wait a little longer. The key factor when storing ice-cream is to keep air circulation to a minimum (in other words, keep the box or eski as small as possible, and seal it tightly).
Lastly, leftovers are a real treat. I’ve been snacking on our last birthday party cake for the past few weeks (yes, really) and it’s honestly the best afternoon-pick-me up (cream + coffee.. who would have thought?!)
RECIPE: Bombe Alaska birthday cake -
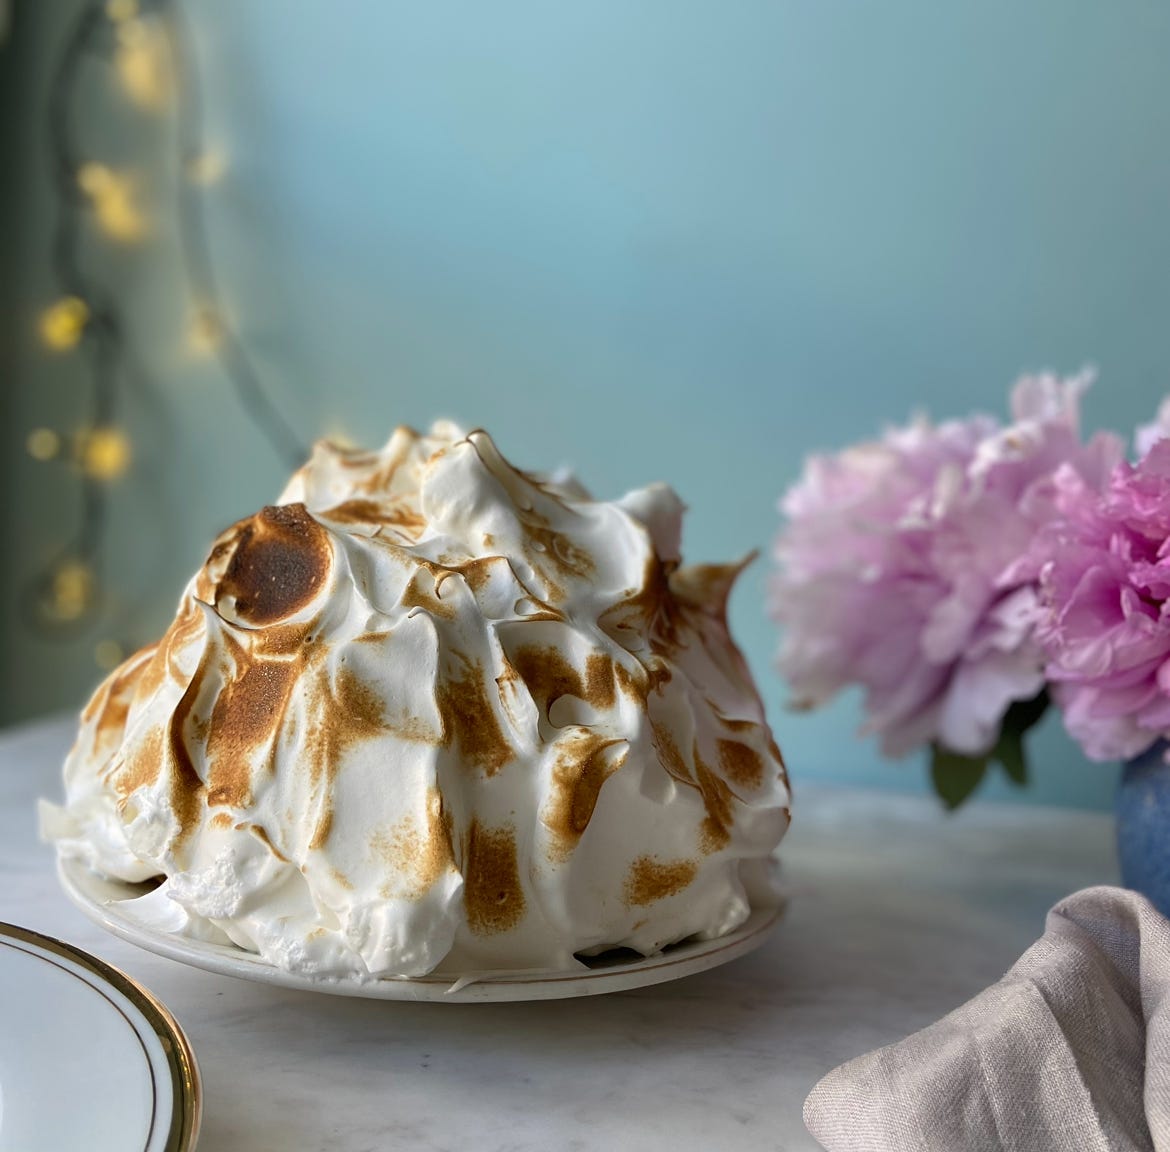
OK, before you start reading too closely, yes this is just like the recipes for Bombe Alaska that you may be familiar with from your childhood (spoiler alert!). I’ve added a few little tweaks (ie much less sugar) but the overall concept remains the same. Ideally, you can use a blowtorch to create the burnt effect on the surface. But, if you don’t have one, a good strong cigarette lighter can work. And, if you don’t have either of these items, don’t despair! I have served this plenty of times without the burn-effect, and it still looks (and tastes) perfect. Here’s how we do it -
You Will Need:
3 litres of good quality ice-cream, preferably with three different flavours (ie vanilla, chocolate and strawberry..).
(You can find my no-churn, chocolate olive-oil ice cream here, and my vanilla ice-cream here. I’ll include my dead-easy strawberry ice-cream recipe below. If you want to take a short-cut, look for some good quality store-bought ice-cream (preferably with minimal sugar, no vegetable fat, and preservative-free..).
For the meringue, you will also need -
1/2 cup egg whites
1/3 cup runny honey
2 teaspoons arrowroot powder
1 teaspoon apple cider vinegar
Let’s start by making the ice-cream -
RECIPE: No-Churn Strawberry Ice-Cream (low sugar, egg-free, gluten-free)
You Will Need -
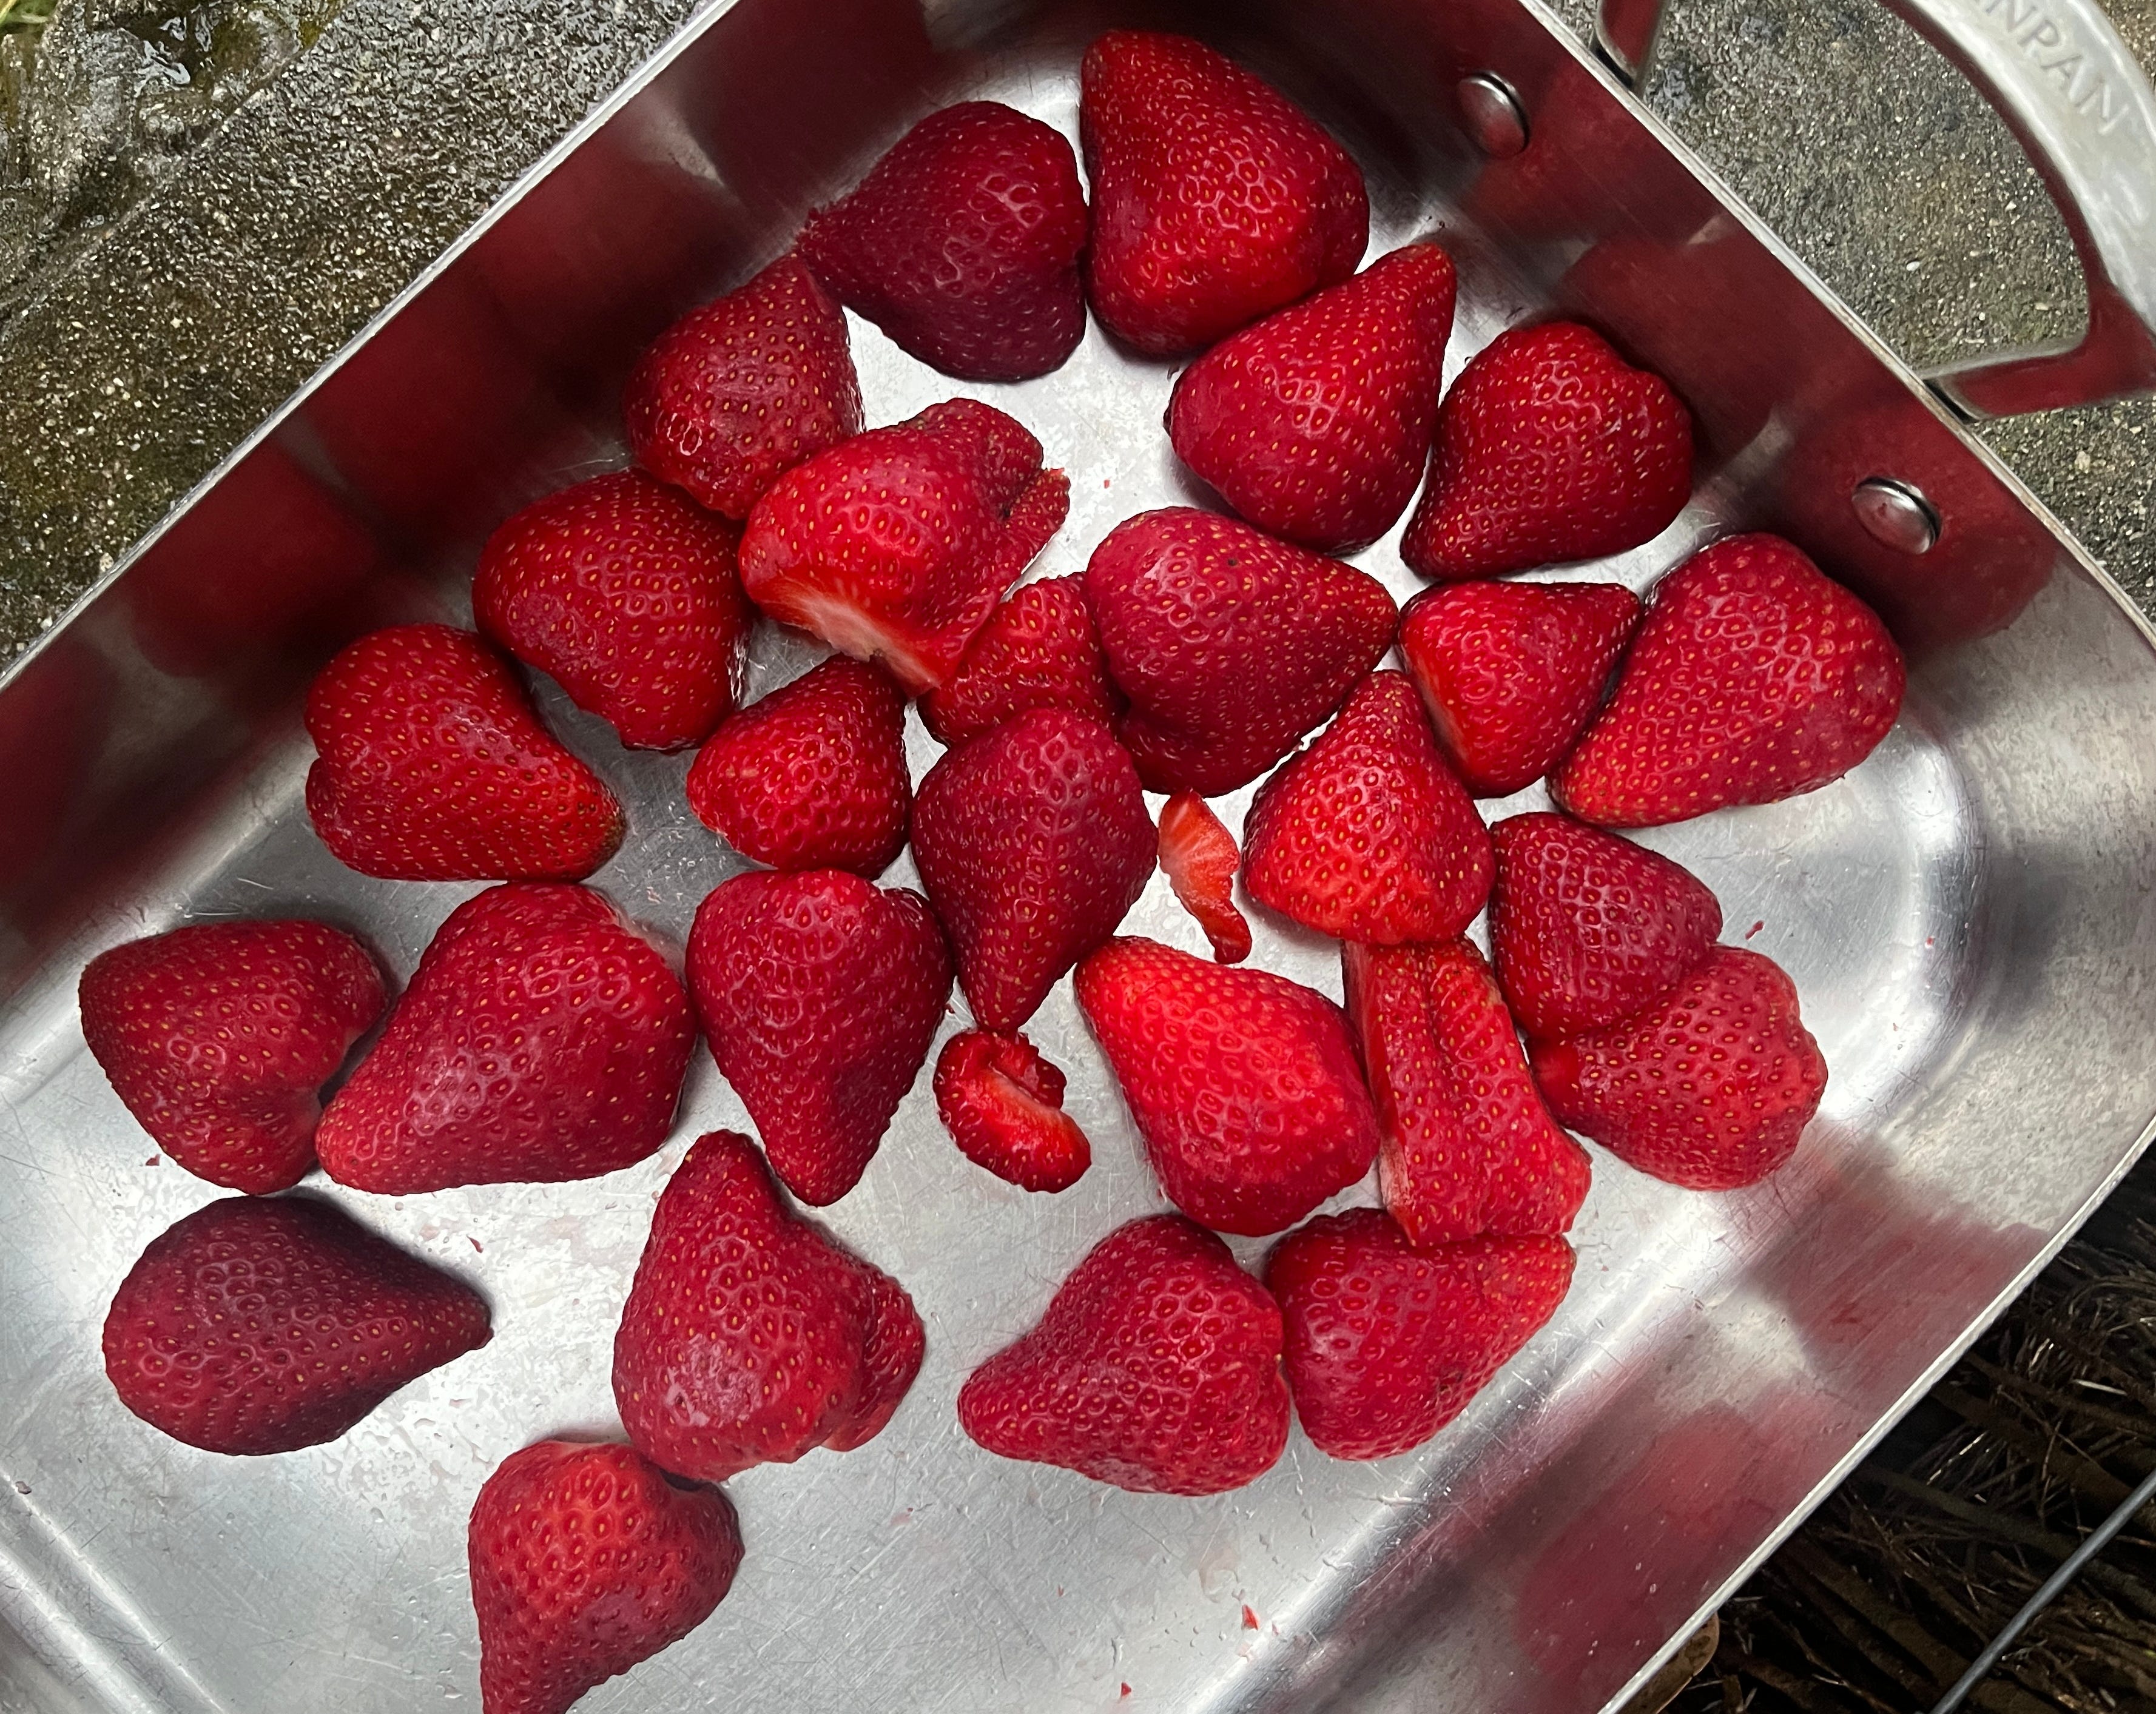
800g strawberries
1/3 cup coconut or rapadura sugar
1/3 cup maple syrup
1/4 cup arrowroot powder
1/3 cup (generous) olive oil
300ml cream
Make the Ice-Cream -
Place the strawberries on a baking tray, and bake in a preheated 190C degree oven for 60 minutes. Take them out halfway, and press them with a fork to release any juice. Keep baking until they have the consistency of very thick, slightly-runny, jam.
Place the strawberries, sugar, maple syrup, arrowroot powder and olive oil in a blender, and blend to a smooth paste. In a separate bowl, whip the cream until thick, and well-aerated. Fold in the strawberry mixture and gently combine to form a light mixture.
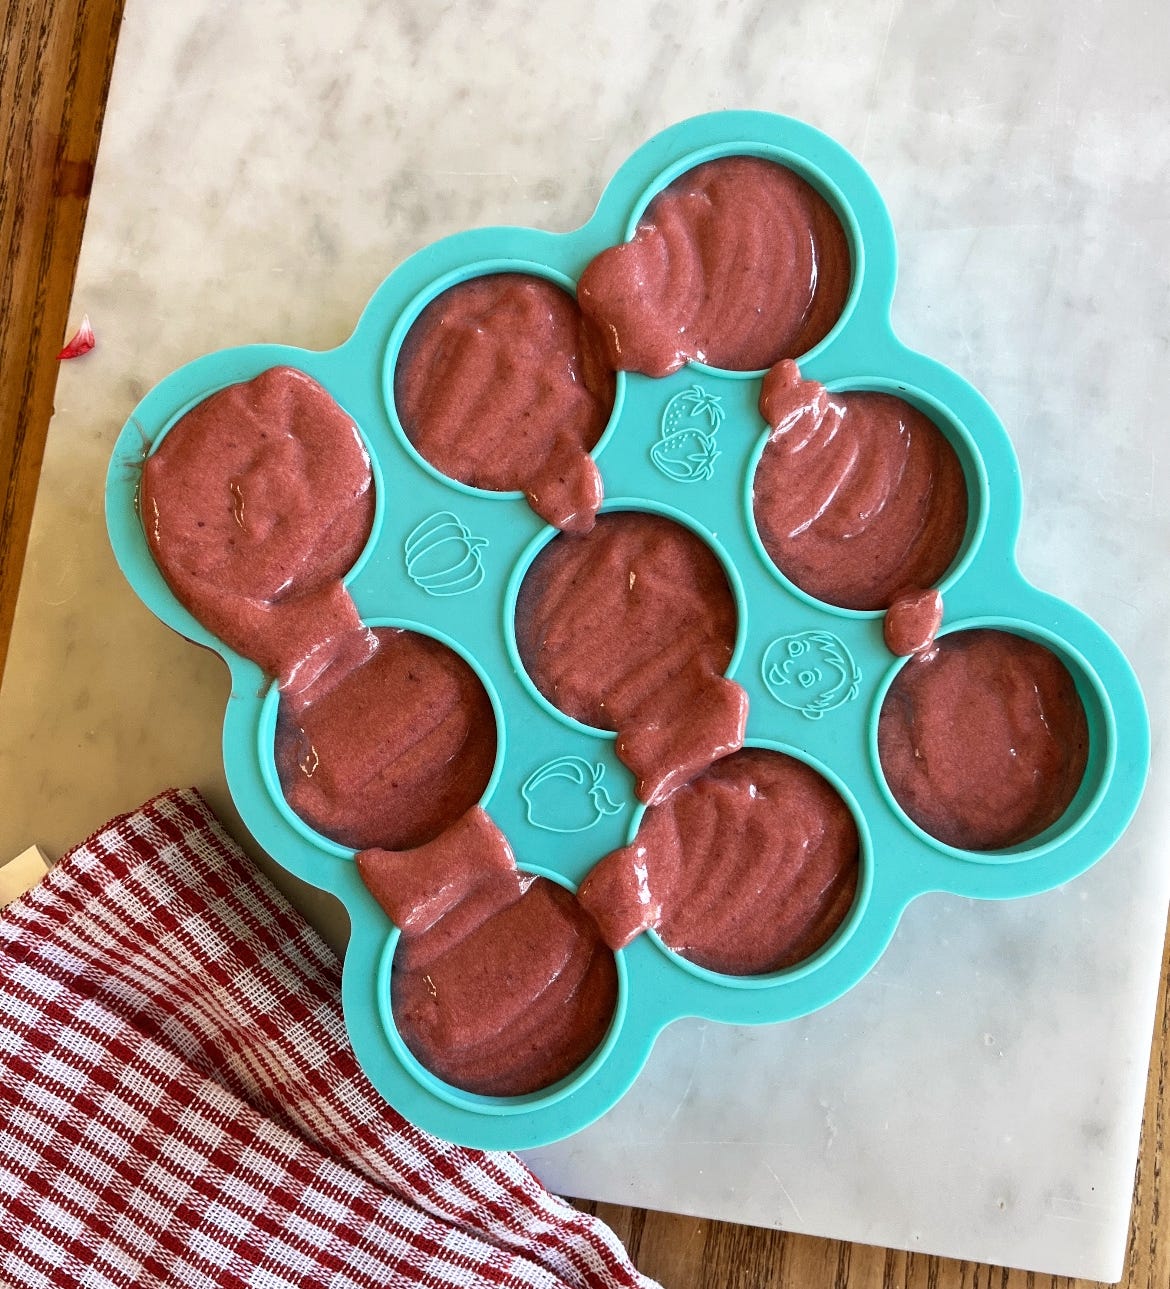
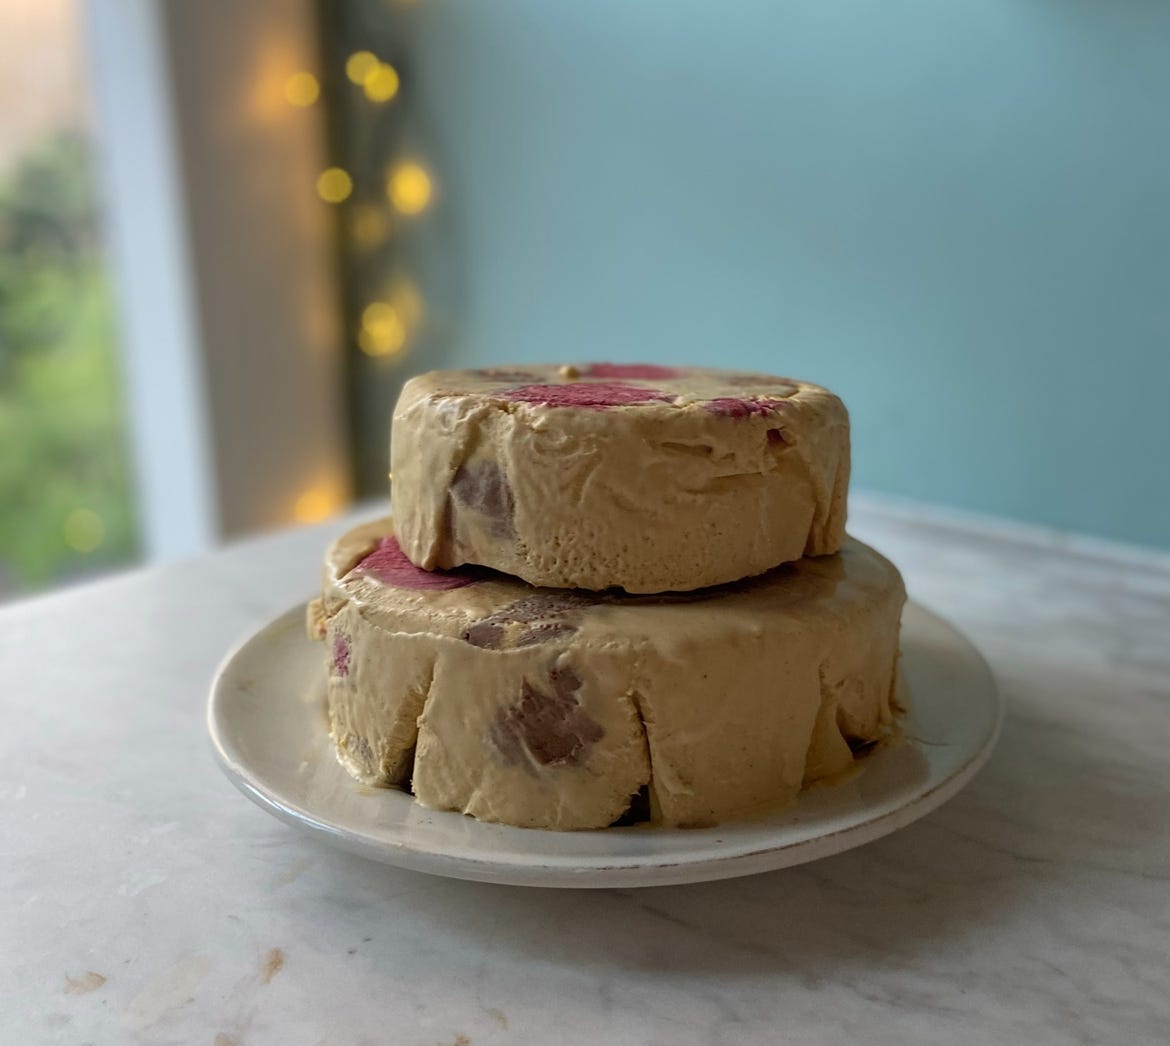
Pour the ice-cream mixture into your mould. For this cake design, I used these silicone moulds as I wanted the cake to have a spotty pattern on the interior (see final pic). Once the strawberry ice-cream is set, push them out into your bowl or cake tin and layer with your other ice-cream flavours (you can try chocolate or vanilla, or buy some pre-made options).
Now, assemble the cake -
Run your bowl quickly under hot water, then turn upside down onto a plate (see below pic).
Prepare the meringue -
You Will Need -
1/2 cup egg whites
1/3 cup runny honey
2 teaspoons arrowroot powder
1 teaspoon apple cider vinegar
Make the Meringue -
Whisk egg whites until stiff (to test if they are properly ready, try tipping the bowl upside down and check that the egg whites stick to the edges).
Next, add in the arrowroot, vinegar and honey. Whisk again until stiff peaks form, and use a spatula to spread it over the surface of the cake. Use a small spoon to create tiny peaks to the surface.
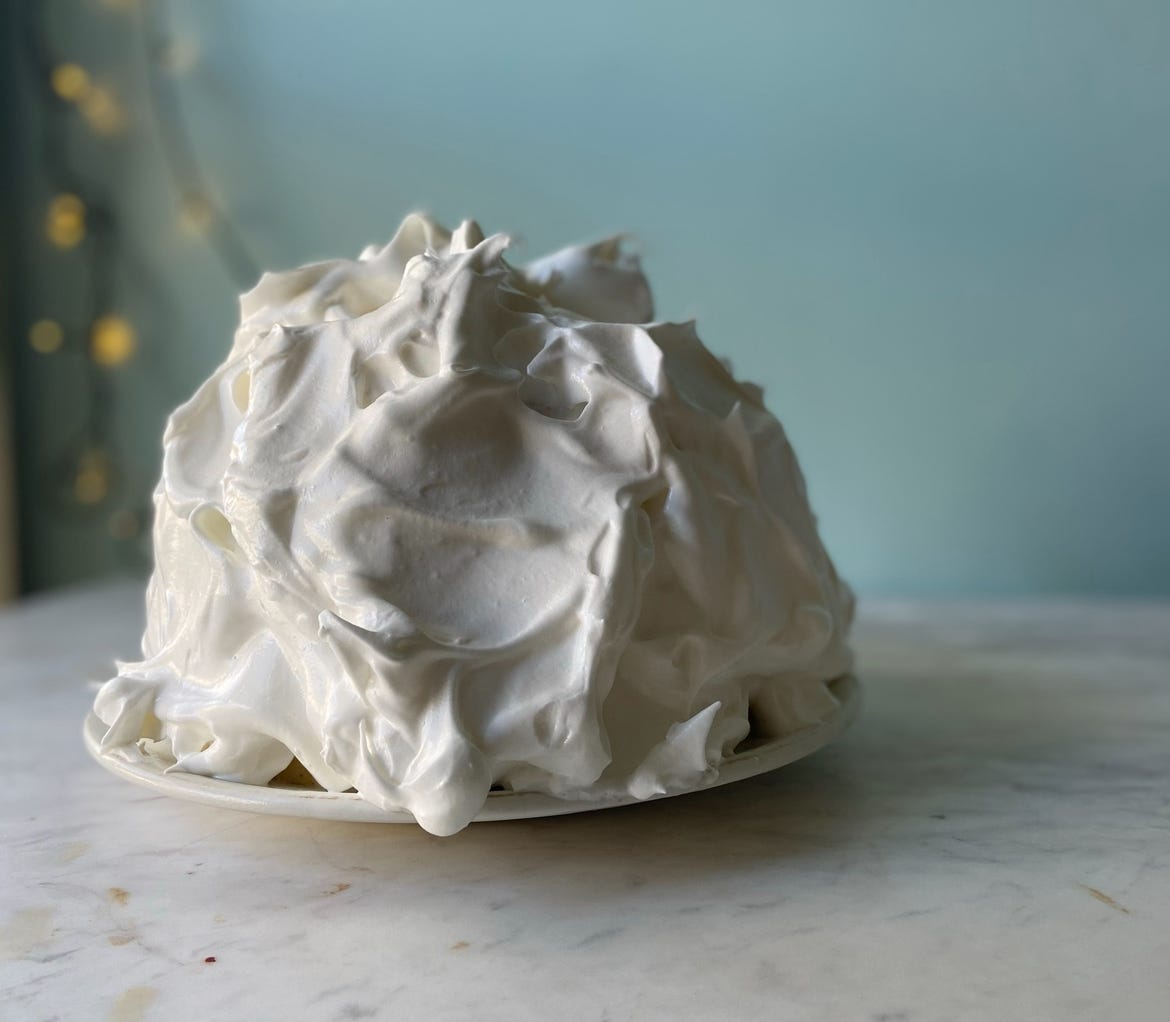
Once covered, return the cake back into the freezer and leave it in there before serving. When you are ready to serve, use a blow-torch to heat the edges for a crispy, burnt effect.